Industrial Dust Collector Market Analysis Drivers, Restraints, and Emerging Solutions
Online Payment Solutions |
2025-10-15 10:43:46
complete step-by-step guide on how to start a PayPal Business Account, from scratch, tailored for anyone including Zimbabwe users:
PayPal has two main accounts:
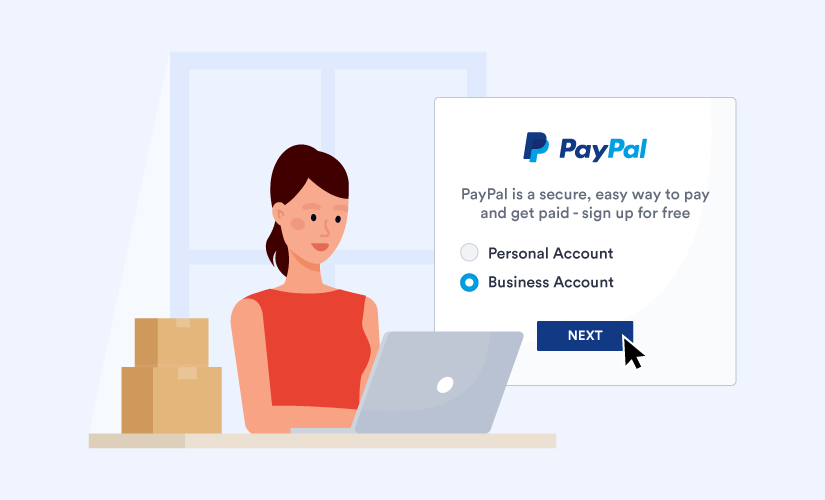
Personal Account – for sending/receiving small amounts or shopping online.
Business Account – for selling products/services, accepting customer payments, and accessing business tools.
For businesses or freelancers, choose Business Account.
Official link: PayPal Business Signup
Go to PayPal Zimbabwe.
Click Sign Up → Select Business Account → Click Next.
Enter a professional business email (e.g., yourname@yourcompany.com).
Make sure you can access it immediately for verification.
Business Type: Choose Sole Proprietor, Company, or Nonprofit.
Business Name: Use your registered business name.
Business Address: Your official business location.
Business Phone Number: For verification.
Full legal name of the account owner.
Date of birth.
Government-issued ID (Passport or National ID).
Proof of address (utility bill, bank statement).
Minimum 8 characters.
Must include uppercase, lowercase, number, and special character.
Read and accept PayPal’s User Agreement and Privacy Policy.
Check boxes and click Agree and Continue.
PayPal will send a verification email.
Click the link to confirm your email and continue account setup.
You can link your Zimbabwean bank account or debit/credit card.
Linking helps verify your account and may allow withdrawals (depending on country restrictions).
Note for Zimbabwe: Receiving and withdrawing international funds directly may be limited. Many Zimbabwean businesses use Payoneer or Wise to receive PayPal payments safely.
Upload required documents when prompted:
Government-issued ID
Proof of address
Business registration certificate (if registered)
Clear scans/photos improve approval speed.
Accept payments via PayPal buttons, invoices, or checkout links.
Monitor transactions and manage your funds via the dashboard.
If PayPal withdrawal is restricted in Zimbabwe, connect your Payoneer or Wise account to receive funds.
This ensures you can access international payments safely.
Use real and verifiable information — fake details risk account limitations.
Keep your account verified with updated documents.
Use business email separate from personal email for security and professional appearance.
I can also make a visual step-by-step tutorial with screenshots showing exactly what to click and fill for Zimbabwe users, including Payoneer/Wise integration to actually receive payments.